")
FL Studio has changed the music landscape for many rappers, beat makers, and producers.
The digital audio workstation continues to attract music makers every day because of how simple and intuitive it is to create songs off MIDI (musical instrument digital interface).
If you’re just getting into FL Studio, this is great news for you!
An entire song can be produced through MIDI where a keyboard can trigger all kinds of sounds and samples including beats, synthesizers, and other virtual instruments.
Here’s a step by step guide on how to record MIDI in FL Studio and turn that song in your head into an actual recording!
Contents
Set Up Your MIDI Device in FL Studio
First, make sure you connect your MIDI device to your computer via a USB cable.
Older MIDI devices require the “IN” and “OUT” MIDI prong cable.
Newer devices are powered and communicate with your computer through a USB cable.
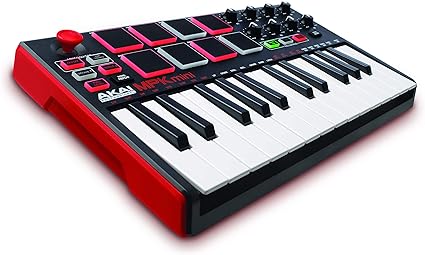
If you’re unsure of what to use, a simple 49 MIDI keyboard is a great place to start.
Brands like Alesis, Akai, and M-Audio make affordable and quality MIDI controllers if you’re looking to purchase one.
For full list of recommendations, check out our midi keyboards for FL studio guide here.
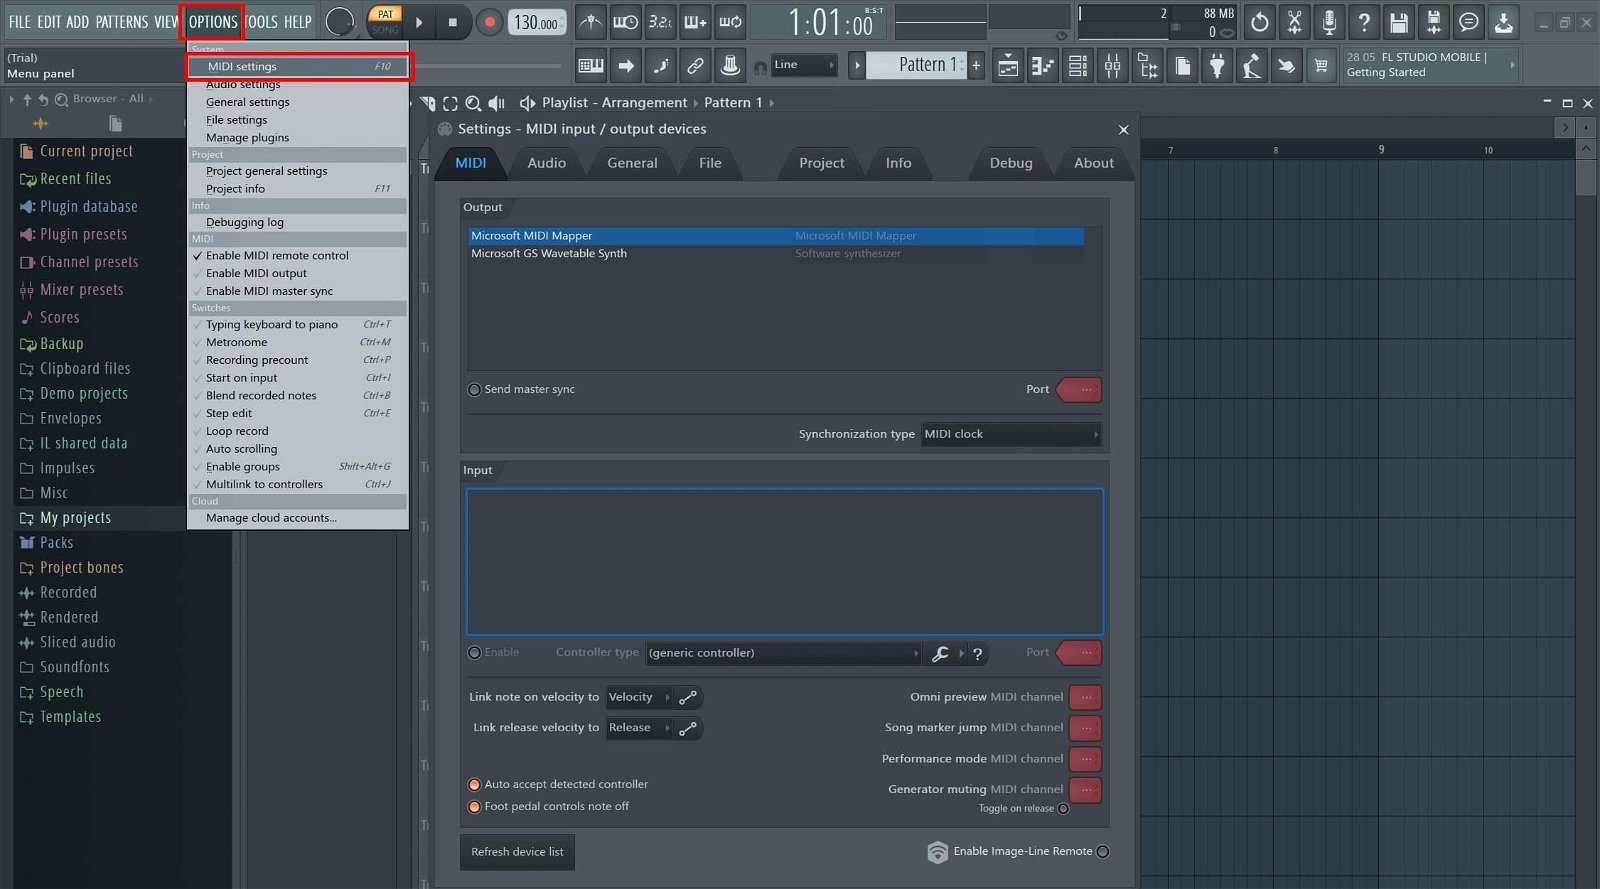
Once your controller is connected and powered, hover over “MIDI Settings” in FL Studio and make sure the device is being seen and registered by FL Studio.
Create and Assign A Track
With your MIDI device connected, you’re halfway there to producing beats.

Most FL Studio projects will already have a mixer created with multiple channels.
You can select one of these, or add a new channel.
FL Studio should automatically recognize your MIDI controller and select the source for you.
Before recording the MIDI part, right click on the record button and double check that “Notes” is checked off.
This allows you to record individual MIDI notes from the controller.
Select Your Virtual Instrument & Record
There are tons of advantages to using MIDI versus traditional audio.
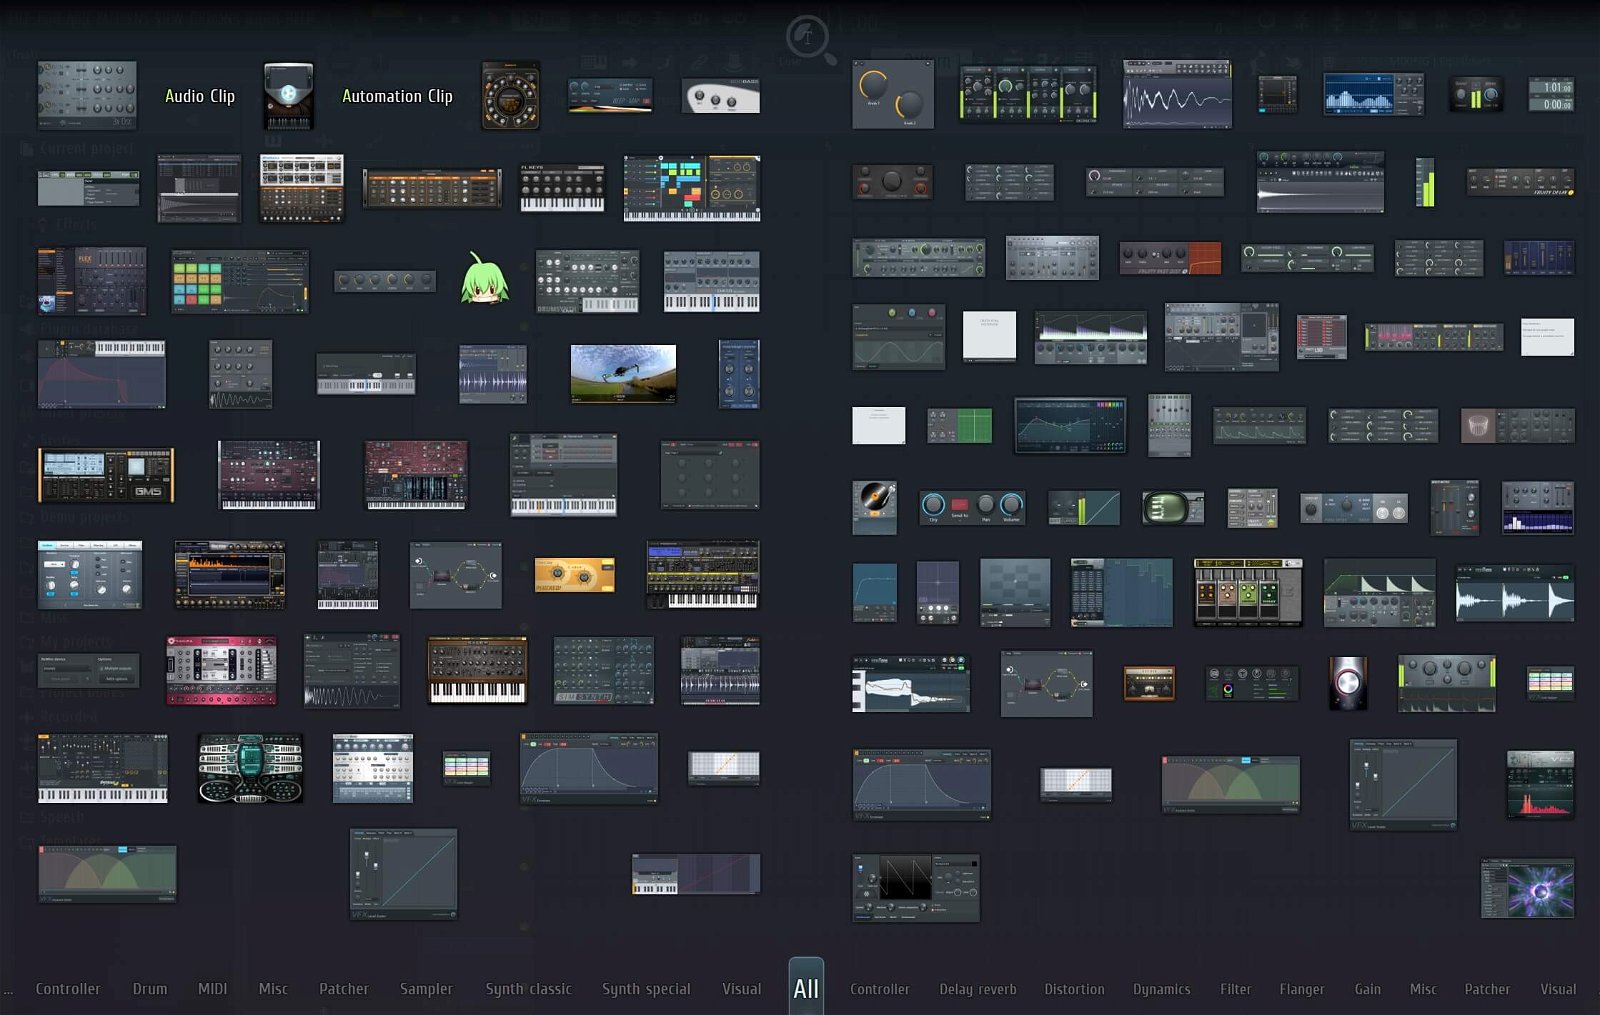
One beautiful thing about MIDI is that it lets you load and trigger any sound imaginable.
FL Studio comes pre-loaded with synths, bass presets, drum samples, keyboards, and much more.
Some instruments will be full scale, and can be triggered by any MIDI key on your controller.
Other instruments like a drum kit will only have 10 to 30 different sounds and will only be triggered by the first set of keys, respectively.
Alternatively, you can purchase a wide range of sound engines and load third-party plugins into FL Studio.
The most famous engines include Omnisphere, Native Instruments, and Output.
MIDI is truly where you can express your sound in whatever way you want.
It can take years to master if you’re just starting out.
So if you’re new to producing, start out with your core, foundational instrument like a piano part or synth loop.
Hit record, and move on to the next element of the song.
Record in the next layer with kick and snare, then add in bass, and so on till you have all the parts of your song fleshed out.
Once Recorded, Manipulate the MIDI Notes
Another strength of MIDI is the ability to go back to your track and manipulate notes.
In FL Studio you can lengthen or shorten notes, move notes around, add or delete a note, and even quantize entire sections (more on quantizing in the next section).
This is a game changer for producers! No more having to land a perfect take.
And now you can switch up certain sections at will.
Say you record a 4 bar loop and accidentally record a wrong note.
Simply go back and delete the note.
Or say you record 4 chords and find out later that you want to change one of the chords.
MIDI gives you flexibility and is forgiving in the recording process.
Harness the Quantize Function
Perhaps the biggest draw to MIDI is the piano grid that synchronizes to the BPM of your FL Studio project.
It’s almost impossible for a human to perfectly execute chord changes, hi-hats, and other instruments in real time.
The quantize function allows you to select a section of MIDI data and “snap” it into alignment with perfect timing.
You can choose what timing (quarter note, eighth note, triplet notes, etc) you’d like applied to the MIDI section.
This is great for genres of music that require machine-like perfection like trap hi-hats or EDM synth parts.
If your style of music is more natural, consider turning down the strength of the quantization so it doesn’t sound too programmed and computerized.
Layer MIDI Sections in FL Studio
One secret with getting that “full” sound for your song is to layer sections and instruments together multiple times.
FL Studio allows you to quickly copy and paste MIDI sections so you can fatten up specific synth lines, piano riffs, you name it.
To do this, take your MIDI recording and copy it over to another channel strip in FL Studio. You can now hardpan one track left and the other one right.
The same part duplicated to left and right will give the sound a wider feel.
To expand off this, try duplicating a MIDI section, and taking all of the notes in the second track and lowering or raising it an octave.
You’ll now have the same riff or line but an octave apart, which will create a layered, beefier sound.
Imagine duplicating the same MIDI part across, say, an orchestra.
Rather than recording 10 different cello, violin, viola, and bass parts, you can duplicate the MIDI tracks and assign different virtual instruments to each track.
Game changing!
Start Recording MIDI in FL Studio Today

MIDI has changed the way music is composed and recorded today.
It’s given everyday bedroom artists access to thousands of sounds, orchestras, drum kits, and more.
Mastering MIDI production can take years of practice and dedication, but actually recording it is a relatively simple process to set up.
Now that you know how to set up and record MIDI in FL Studio, it’s time to open up your creativity and begin programming your own song!
In no time you’ll have a fully produced recording ready to be heard by the world. So what are you waiting for?
Open up your laptop and start creating!
Also Read: How To Record Guitar in FL Studio (Beginner’s Guide)